Seamlessly integrate your codebases, documentation, and PDFs into one unified knowledge base.
Driver supports multiple ways of connecting your code to automate documentation and use them to create richer, customized documents. You can upload codebase files piecemeal, but configuring a Git provider gets you additional features like automatic updates.
Configuring a Git provider to connect codebase sources
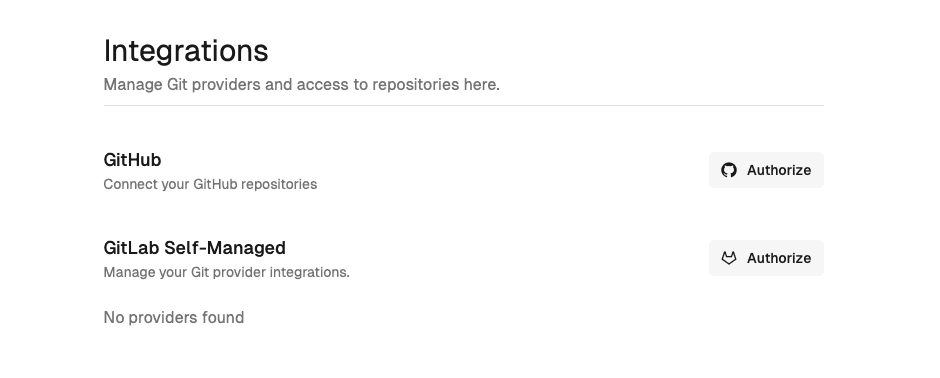
When you first set up a Driver workspace, you'll be prompted to configure a Git provider. Subsequently, you can find all these configuration settings in Settings>Integrations.
Configuring GitHub
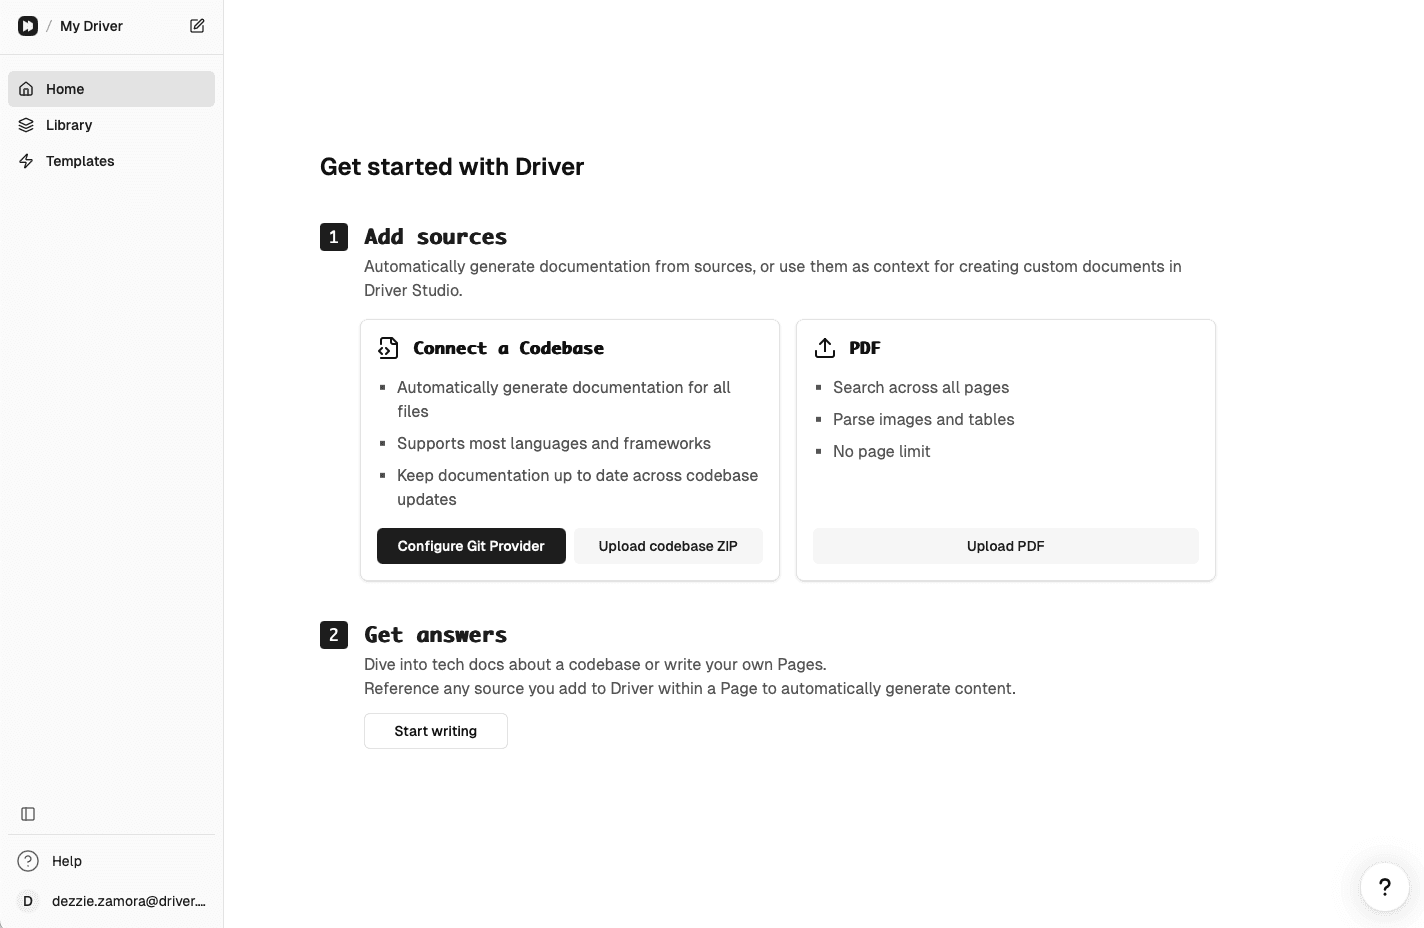
If you are setting up your Driver workspace for the first time, select Configure Git Provider from the Home page. You'll be taken to the Integrations settings page, which is viewable only by workspace Admins.
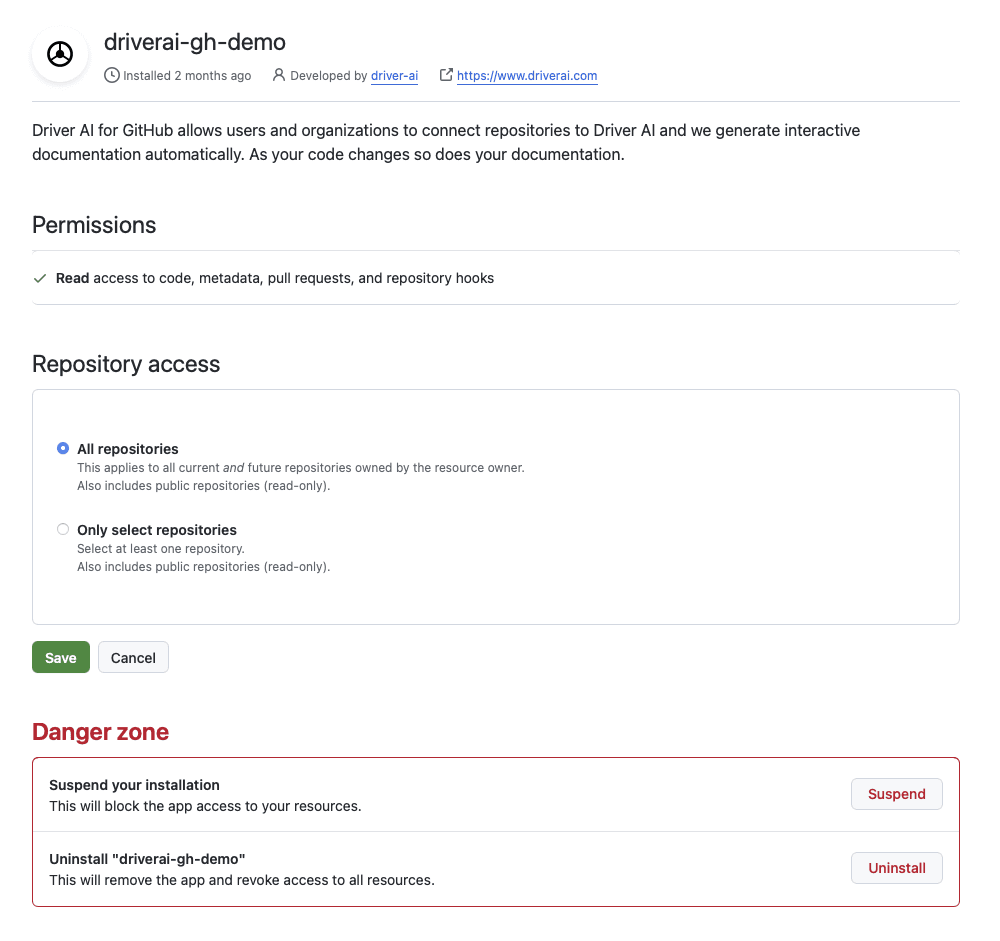
Under GitHub, select Authorize. You'll be asked to authenticate your GitHub account, and you'll be taken to Github>Settings>Integrations>Applications>driverai-gh-demo.

Under Repository access, select All Repositories, or specify the repos you want Driver to access. Hit Save.
Navigate to your Library to find the codebases you connected. Connected codebases do *not* count towards your sloc limit until you choose to generate docs. Learn more about our pricing here.

Changing GitHub permissions to add or remove codebases
To change which codebases you want connected to your Driver workspace, edit your GitHub permissions.
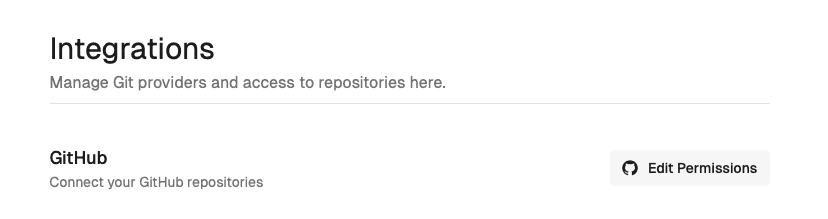
1. From the Settings>Integrations menu, select Edit Permissions. You'll be asked to re-authenticate your Github credentials.
Add/Remove the codebases from your Driver workspace and hit Save. Driver will automatically connect any new codebases you selected to your workspace. Any ungenerated codebases you disconnect from Driver will be removed from your workspace. If you have generated documentation for any codebase, Driver will keep the last known Docs version or Studio pages in your workspace unless you manually delete them.

Removing GitHub from your Driver workspace
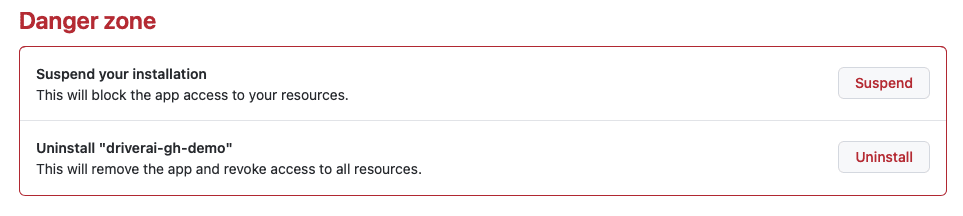
Log in to your GitHub account. Under Github>Settings>Integrations>Applications>driverai-gh-demo, scroll down to the Danger zone and select either Suspend or Uninstall. 🥲.
Configuring Gitlab Self-Managed
If you are setting up your Driver workspace for the first time, select Configure Git Provider from the Home page. You'll be taken to the Integrations settings page, which is viewable only by workspace Admins.
Under GitLab Self-Managed, select Authorize.
In the dialog that appears, name your instance and paste in your URL.

In GitLab, navigate to Groups. Select the group you want to connect to Driver, or create a new group.

Navigate to that group's Settings>Access tokens page.
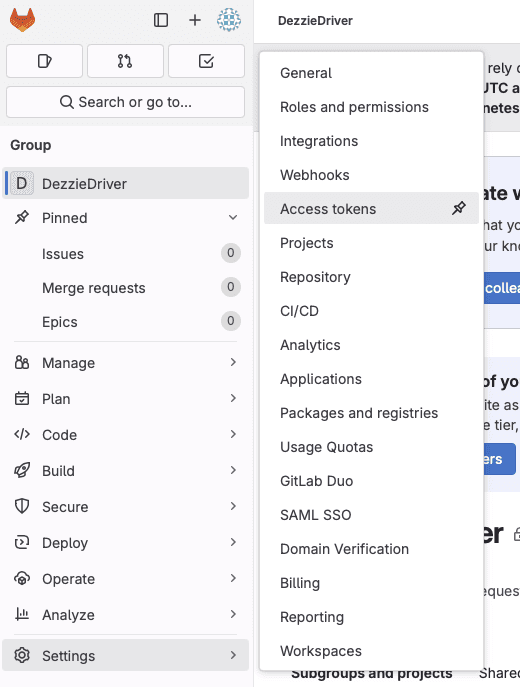
Add a new token to use with Driver.
Give it a unique name and set an appropriate expiration date.
Give it at least a minimum role of Maintainer, or Owner.
Select the scopes
api,read_api, andread_repository.Save the new token, and copy the unique name and token value.
In Driver, navigate to Settings>Integrations. Under GitLab Self Managed, select the new +Add Token button.

You'll be prompted with a dialog to paste in your group name and unique token value. Enter the values for Group Name and Group Access Token, and save the information.

Selecting codebases to connect to Driver
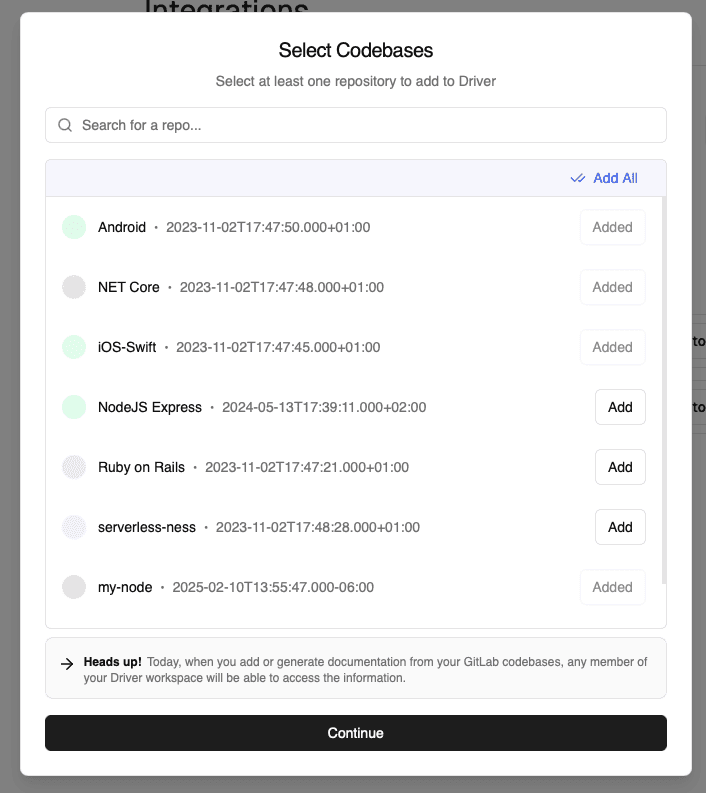
Now you'll be able to select the Manage Repositories button.

Now select the codebases that you want available in your Driver workspace.
Navigate to your Library to find the codebases you connected. Connected codebases do *not* count towards your sloc limit until you choose to generate docs. Learn more about our pricing here.
Enabling automatic codebase updates on GitLab
To enable automatic codebase updates on Driver, you'll need to use your access token and create a webhook.
In Driver, navigate to Settings>Integrations. Select the Automatic Updates button corresponding to the GitLab group you want to configure.

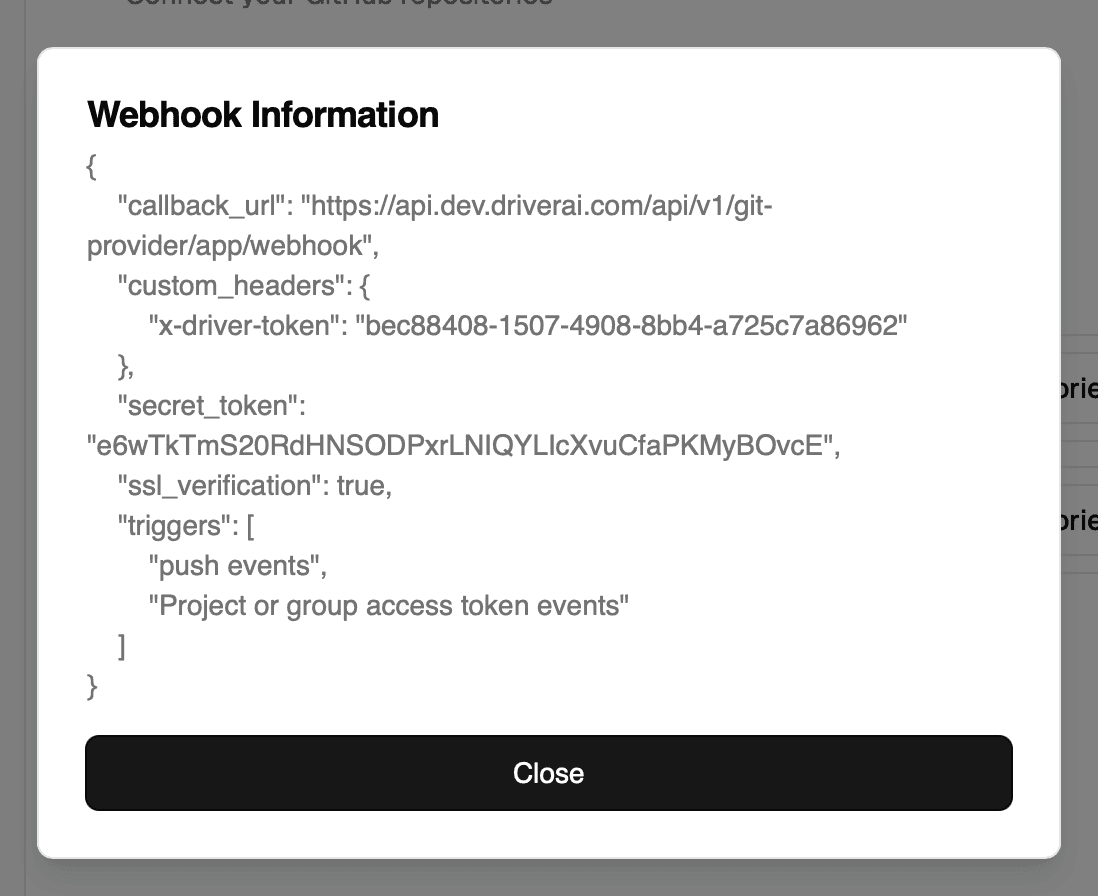
You'll see similar webhook information unique to your workspace. You'll need this information to finish configuring your webhook in GitLab.
Return to your Group Settings in Gitlab and navigate to the Webhooks section.
In the webhook settings URL field, paste the
callback_urlvalue from your webhook information.Add a custom header. Using your webhook information, paste the
custom_headername in to the Header name field. Paste the value into the Value field.Copy the
secret_tokenvalue from your webhook information into the Secret token field.Under the Triggers section, select "Push events" and "Project or group access token events."
Confirm that SSL verification is enabled and click the Add Webhook button to finish.
Uploading a Codebase .zip File Source into Driver
You don't need to give Driver access to your Git instances. You can upload a .zip file of your code via Home or Library.
Via Home:

Via the Library:

Uploading a .pdf Source into Driver
Driver can also use spec sheets, schematics, and similar files. You can upload a .pdf file via Home or Library.
Via Home:
Via Library:
Generating Documentation
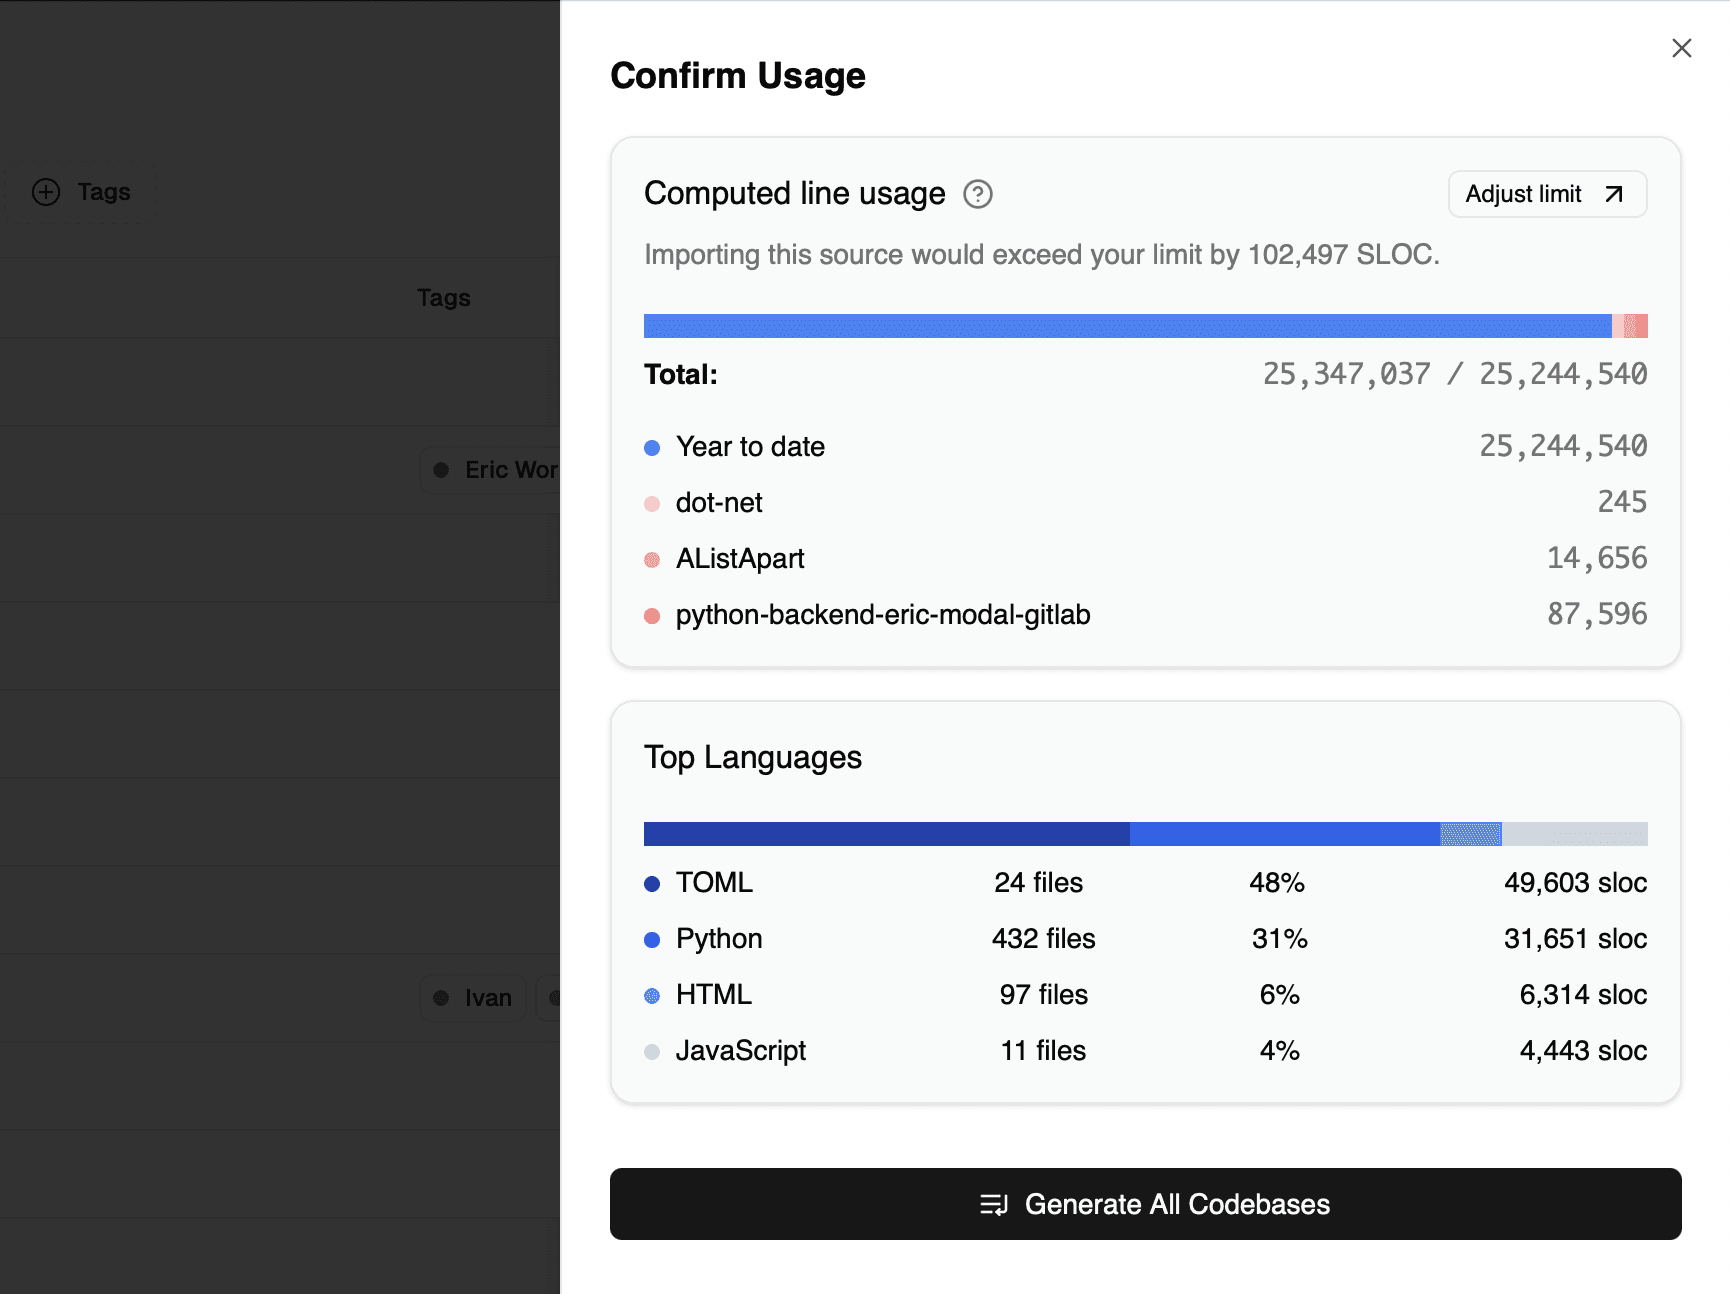
Once a codebase is connected, Driver will analyze the content of the codebase, including the total lines of source code, file count, excluded files, and codebase size. Driver Docs charges based on the volume of source code uploaded. Learn more about our value-based pricing here.
To generate documentation for a codebase, navigate to your Library. Select one or more codebases and select the Generate Docs button.
Confirm the projected usage and select Generate.
Excluding files with a .driverignore
You may not want all of the content of your codebase to be analyzed. You can include a .driverignore file as part of your codebase to specify files, file types, and folders to exclude from processing. The semantics are the same as .gitignore.
Last Updated: